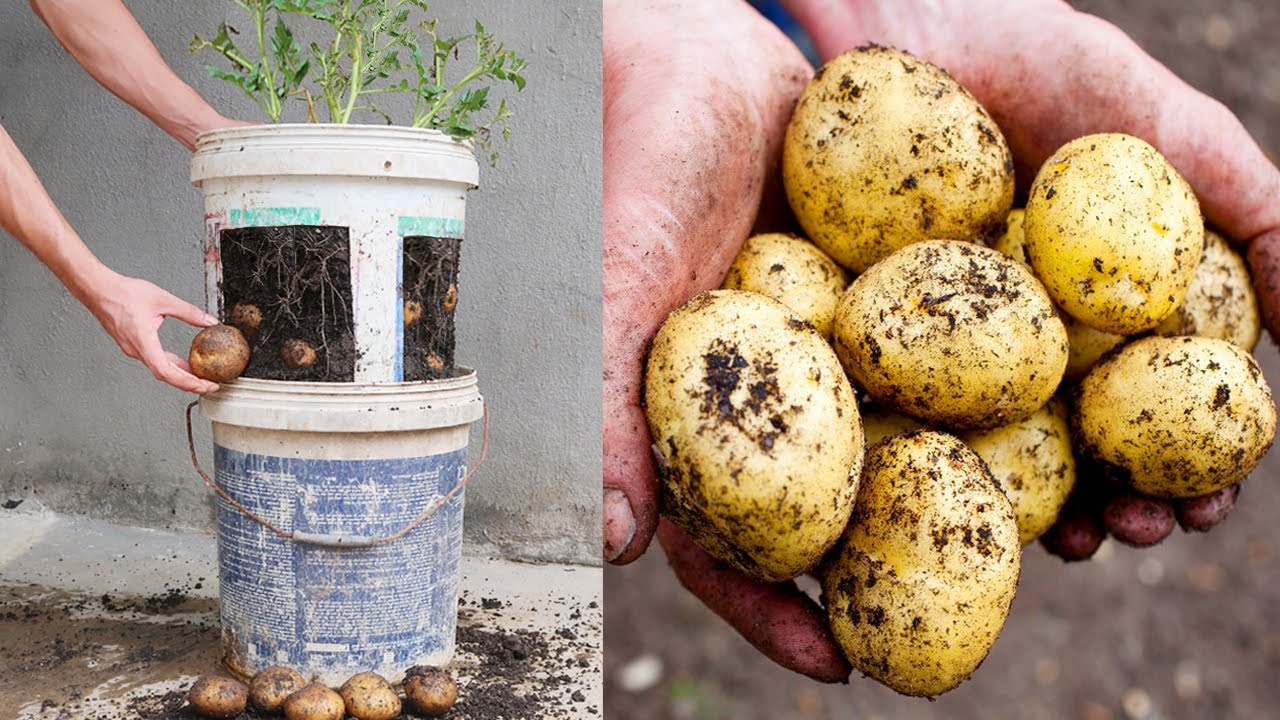
5 Easy Steps to Grow Potatoes in Old Plastic Buckets for Beginners
How to Grow Potatoes in Old Plastic Buckets: A Beginner’s Guide
Introduction
Imagine looking out your kitchen window and seeing vibrant green potato plants flourishing in your old plastic buckets. It’s a satisfying sight that also brings the promise of fresh homegrown potatoes. However, many beginners often feel uncertain about how to begin this delightful gardening journey. You might be wondering which materials to use or the best techniques for a successful harvest. Continue reading to discover how you can transform those plastic buckets into a potato-growing haven.
Required Materials
Before you dive into growing potatoes in plastic buckets, it’s essential to gather the necessary materials. By having everything ready, you ensure a smooth and enjoyable process.
- Plastic buckets: Ideally, choose ones that are at least 5 gallons in size.
- Potato seeds: Select certified disease-free seed potatoes from your local garden center.
- Potting soil: Use nutrient-rich potting soil to give your plants the best start.
- Fertilizer: A balanced fertilizer will help to nourish your potato plants throughout their growth.
With these materials on hand, you’re ready to embark on your potato-growing adventure.
Step-by-Step Process
Growing potatoes in plastic buckets is straightforward when you follow these simple steps.
Step 1: Prepare the Buckets
Before planting, prepare your plastic buckets:
- Drill small drainage holes in the bottom of the buckets to prevent waterlogging.
- Clean the buckets thoroughly to remove any residues from previous uses.
Step 2: Add Soil
Now, it’s time to fill your buckets:
- Start by filling the bottom with about 4-6 inches of potting soil.
- Lightly pack the soil to create a firm base.
Step 3: Plant the Potatoes
Next, you’ll plant the seed potatoes:
- Place 2-3 seed potatoes on top of the soil, cut side down if applicable.
- Cover the potatoes with an additional 4-6 inches of soil.
Step 4: Water and Fertilize
Your potatoes need care to thrive:
- Water the soil gently until it is well-moistened, ensuring not to cause runoff.
- After a few weeks, apply a balanced fertilizer according to the instructions on the package.
Step 5: Monitor Growth
As your potatoes grow, you’ll need to keep an eye on them:
- Ensure the buckets receive adequate sunlight for at least six hours a day.
- Water regularly to keep the soil consistently moist but not soggy.
Common Mistakes to Avoid
Avoiding common pitfalls can significantly enhance your chances of a successful potato harvest. Be mindful of the following:
- Using fertilizers excessively can lead to nutrient burn, harming your plants.
- Overwatering your potatoes can cause root rot and stunt growth.
- Neglecting to ensure drainage can result in waterlogged soil.
FAQ
What type of potatoes should I use for container gardening?
Choose certified seed potatoes, such as Yukon Gold or Red Pontiac, for the best results.
How often should I water my potato plants?
Water them deeply once or twice a week, depending on the weather, ensuring the soil remains moist.
When will my potatoes be ready for harvest?
Typically, potatoes are ready to be harvested about 10 to 12 weeks after planting when the foliage turns yellow and dies back.
Conclusion
Growing potatoes in old plastic buckets is a rewarding and sustainable gardening project. By following these steps, you can enjoy the experience of harvesting your potatoes in a small space. Have you ever tried growing potatoes at home? Share your thoughts in the comments below!