5 Easy Steps to Create a DIY Acrylic Base & PE Rattan Basket for Beginners
Creating a DIY Acrylic Base and PE Rattan Basket: A Step-by-Step Guide for Beginners
Have you ever found yourself in need of a stylish storage solution, but everything you see in stores feels either too expensive or just plain uninspired? If so, you’re not alone. Many people desire a unique, personal touch in their home while keeping things organized. A DIY acrylic base and PE rattan basket could be the perfect project for you. This guide will walk you through the simple steps needed to create a stunning piece that complements your decor beautifully. Read on to explore how to make one for yourself!
Required Materials
Before diving into crafting, here’s a list of materials you’ll need:
- 1 sheet of acrylic (preferably clear)
- PE rattan in your color choice
- Hot glue gun and glue sticks
- Scissors
- A ruler
- Marker or pen
- Protective gloves
Having everything prepared will streamline the crafting process and ensure that you have a successful DIY experience.
Preparation Steps
Getting ready to craft your basket involves a few straightforward preparations. Follow these steps to set the groundwork:
- Measure and cut your acrylic sheet into your desired basket size, keeping the height and width in mind.
- Sketch out the design you want for your basket. This could include the amount of rattan to wrap or specific patterns.
Taking time in this preparation phase is crucial. A clear plan will help guide your creativity as you move forward.
Cutting the Acrylic
When cutting your acrylic, be sure to use protective gloves, as the edges can be sharp. It’s advisable to use a fine saw or a dedicated acrylic cutter for smooth edges.
Planning the Rattan Design
Think about how much of the rattan will be visible on the basket’s sides. You can choose full coverage or a more modern, minimal look.
Crafting Your Basket
With everything prepped, it’s time to assemble your basket. Here’s how:
- Start by gluing the acrylic pieces together. Use a hot glue gun for a strong bond, ensuring you’re using it in a well-ventilated area.
- Wrap your PE rattan around the edges of the acrylic. Secure it using small dots of glue as you go along.
- Allow the glue to set before moving on to handle the basket.
As you’re crafting, you can play with different lengths of rattan for a more textured look.
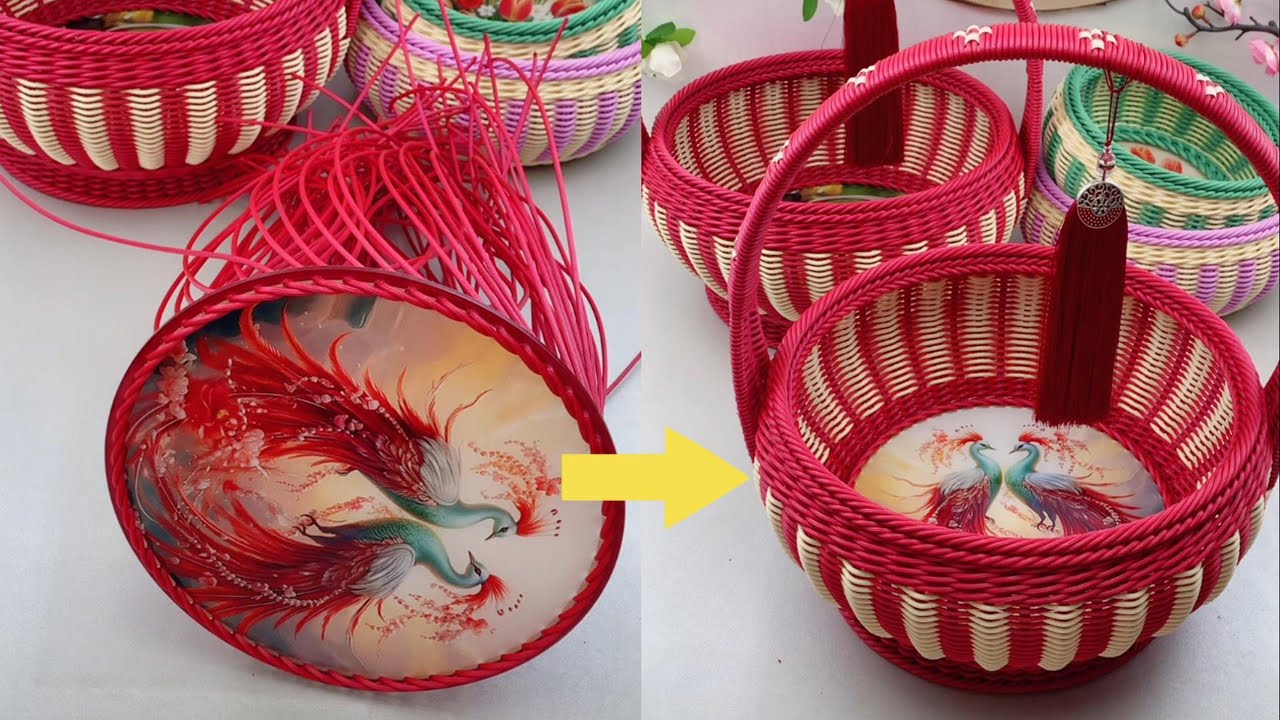
Adding a Handle
If you’d like to incorporate a handle, cut extra rattan lengths to form a loop at the top before sealing the edges. This will give your basket an elegant touch.
Finishing Touches
Once your basket is assembled and the glue has dried completely, inspect the edges for any rough spots and trim them where necessary. A neat finish adds to the overall aesthetic.
Common Mistakes to Avoid
Even simple crafts can come with pitfalls. Here are some common mistakes to steer clear of:
- Not securing the acrylic firmly enough, leading to instability.
- Using too much glue, causing excess to ooze out and create a mess.
- Overestimating the amount of rattan needed, which can lead to waste.
- Skipping the protective gloves while working with acrylic.
A little attention to these details can save you from frustration and ensure your craft turns out beautifully.
FAQ
Can I customize the size of the basket?
Yes, you can adjust the measurements of the acrylic according to your needs. Just remember to keep the proportions in mind.
What if I don’t have a hot glue gun?
You can use a strong adhesive designed for plastics, but a hot glue gun is typically quicker and easier for projects like this.
How do I clean my acrylic basket?
Use a gentle soap solution and a soft cloth to clean the acrylic. Avoid harsh chemicals as they may scratch or damage the surface.
Conclusion
Creating your own DIY acrylic base and PE rattan basket is not only a fun project but also a practical way to add style to your home. By following these steps, you can make something truly unique that reflects your personal taste. What design ideas do you have in mind for your basket? Share your thoughts in the comments below!