This simple fix transforms your metal water lock into a leak-proof masterpiece…
This Simple Fix Transforms Your Metal Water Lock into a Leak-Proof Masterpiece
If you have ever faced the frustration of a leaking **metal water lock**, you’re not alone! Many homeowners encounter this issue, often leading to costly repairs. Fortunately, there’s a simple and effective solution that can save you both time and money. In this article, I’ll share a revolutionary fix that transforms your water lock into a **leak-proof masterpiece**. Let’s dive right in!
Understanding the Problem
Before jumping into the solution, it’s essential to understand why your **metal water lock** may be leaking. Common causes include:
- Corrosion and rust buildup.
- Worn-out seals or gaskets.
- Poor alignment of components.
These issues can result in unwanted leakage, but don’t worry! The fix is simpler than you might think.
The Step-by-Step Solution
Step 1: Gather Your Supplies
For this project, you will need:
- A **metal water lock**.
- Plumber’s tape (also known as Teflon tape).
- A wrench or pliers.
- Cleaning cloth.
Step 2: Shut Off the Water Supply
Always begin by shutting off the water supply to avoid spills and accidents. Make sure the area is dry before proceeding.
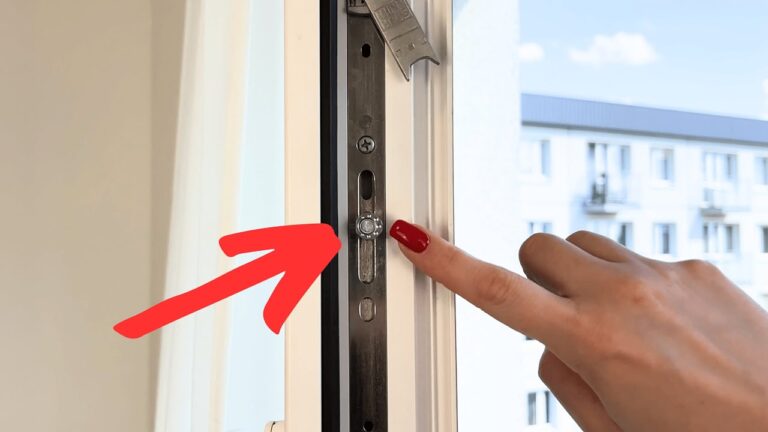
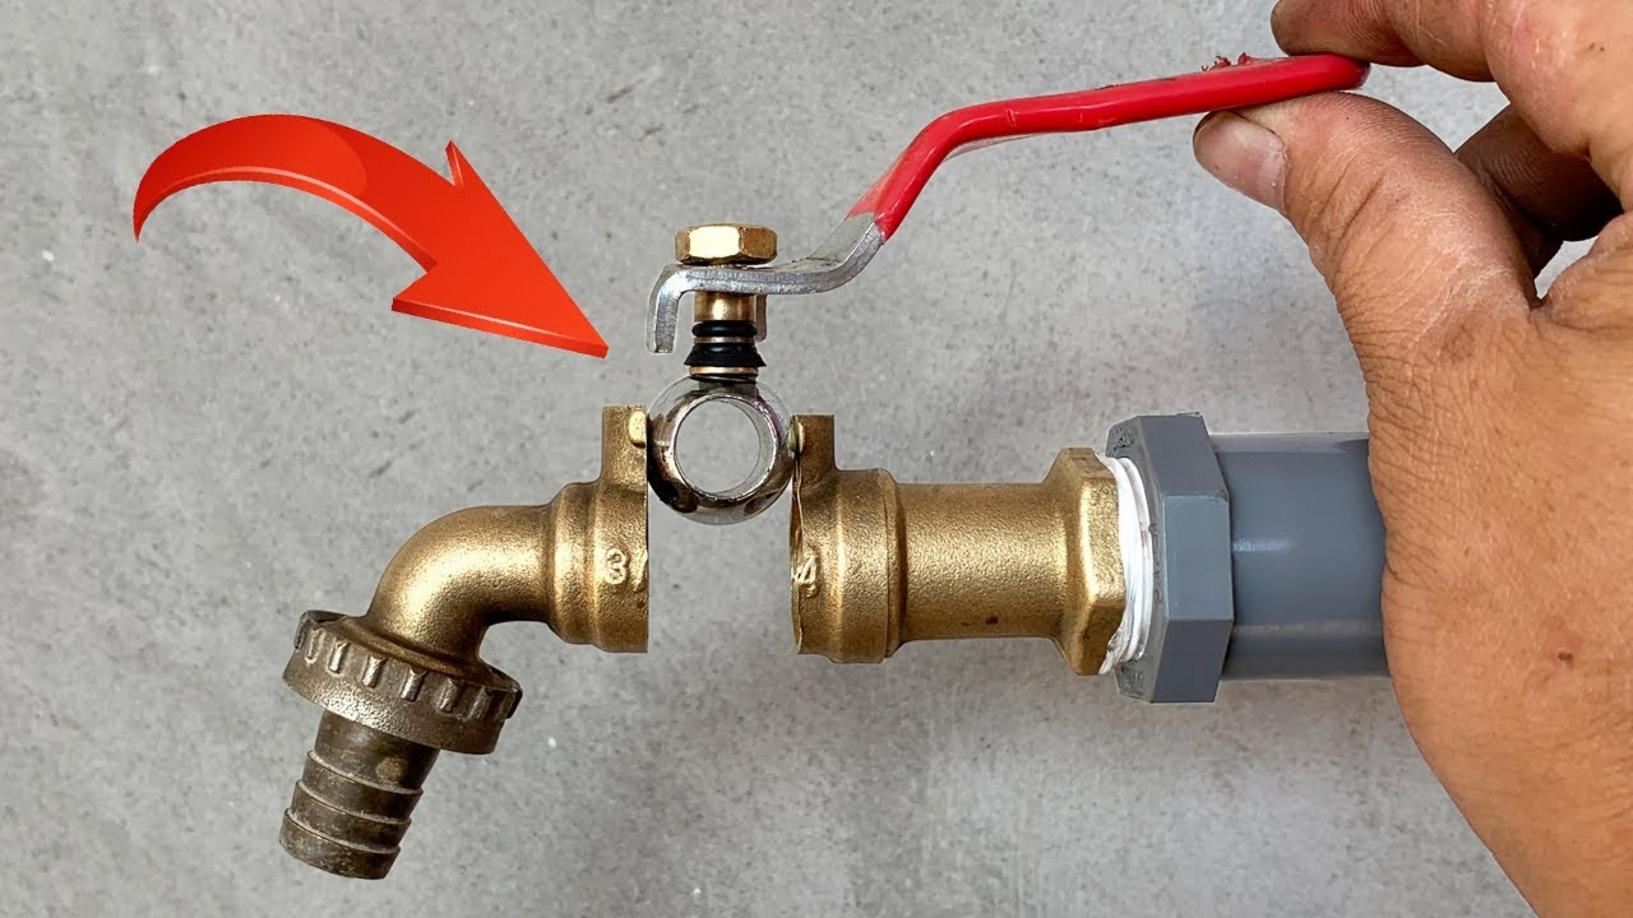
Step 3: Disassemble the Water Lock
Gently use your wrench or pliers to unscrew the fittings of the **metal water lock**. Take your time to avoid damage.
Step 4: Clean the Threads
Use your cleaning cloth to wipe away any debris or rust from the threads. A clean surface will help the **plumber’s tape** adhere better.
Step 5: Apply Plumber’s Tape
Wrap the threads of the metal fittings with **plumber’s tape**. Make sure to cover them evenly; this will create a tight seal.
Step 6: Reassemble the Water Lock
Carefully screw the water lock back together, ensuring it is tight but not overtightened. This could cause damages.
Step 7: Turn On the Water Supply
Finally, turn the water supply back on and check for leaks. Enjoy the satisfaction of your **leak-proof masterpiece**!
Practical Tips Based on Experience
- Always use high-quality **plumber’s tape**; it offers better sealing.
- Check your fixtures regularly to catch any potential leaks early.
- If you notice persistent leaking, it might be time to replace the entire lock.
Common Mistakes to Avoid
- Not cleaning the threads properly before applying tape.
- Using too little tape; ensure you cover the threads adequately.
- Forgetting to check for alignment before reassembling.
Conclusion
Now that you have this **simple yet effective fix** at your fingertips, there’s no need to let leaking water locks drain your wallet. Take action today by trying out this method and experience the joy of a newly repaired **metal water lock**. If you found this guide helpful, please share it with your friends and subscribe for more amazing DIY projects and hacks. Happy gardening!