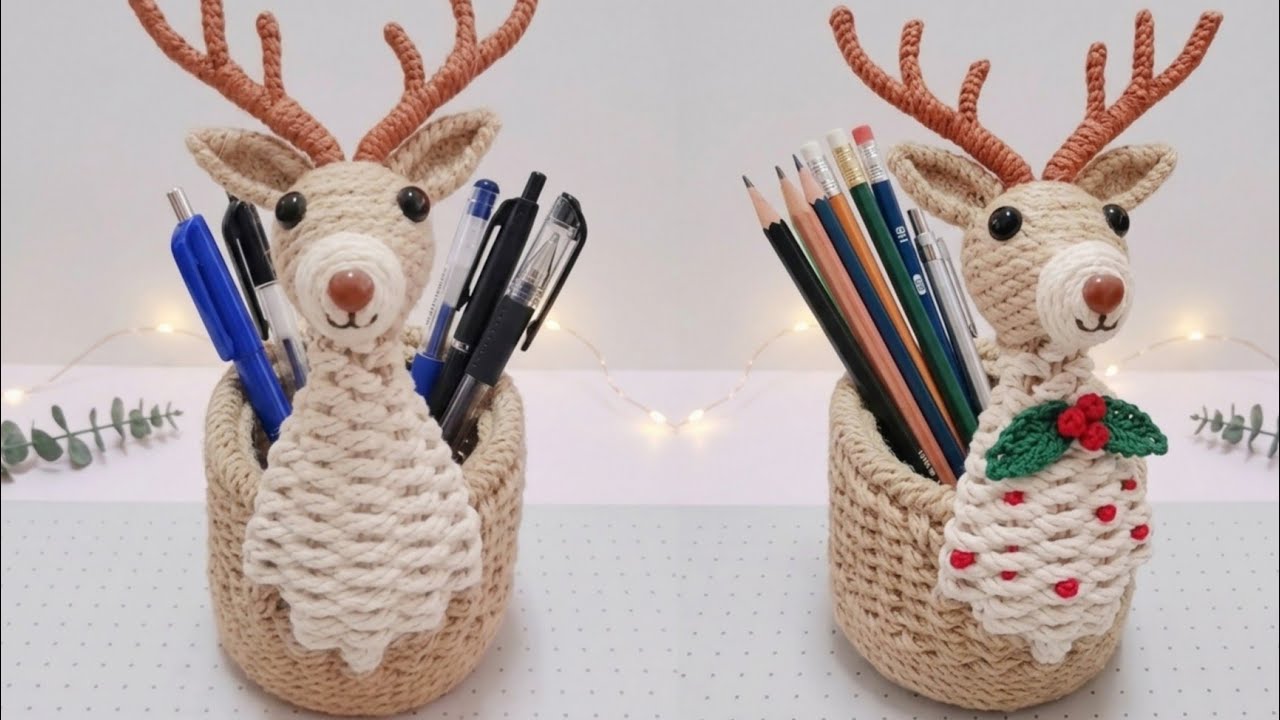
5 Steps to Create the Most Beautiful Handwoven Deer Pen Holder You’ll Love!
5 Steps to Create a Beautiful Handwoven Deer Pen Holder
Introduction
Have you ever found yourself surrounded by cluttered pens, pencils, and markers? It’s easy for writing tools to get lost on the desk, creating a chaotic workspace. A decorative pen holder can help organize these items while adding a charming touch to your desk. As you explore how to make a handwoven deer pen holder, you’ll discover a creative project that not only enhances your space but also provides a sense of accomplishment. Keep reading to find out how you can craft this delightful piece.
Required Materials
Gathering the right materials is crucial for your handwoven pen holder project. Here’s what you need:
- Natural Twine: Choose a durable, eco-friendly option.
- Craft Wire: This will help structure your holder.
- Wooden Base: A solid piece of wood will serve as the pen holder’s bottom.
- Scissors: For cutting twine and wire.
- Hot Glue Gun: To secure components together.
- Decorative Paints or Stains: Optional, for personalizing your wooden base.
Step-by-Step Guide
Creating your handwoven deer pen holder can be a rewarding experience. Follow these steps to make it happen:
- Prepare Your Base: Start by sanding the wooden base to ensure a smooth surface. If you wish, apply protective paint or stain and let it dry completely.
- Cut the Wire: Depending on how tall you want your pen holder, cut lengths of craft wire. Aim for at least 5-6 pieces, around 6 to 8 inches long.
- Shape the Wire: Bend the wire into a deer headshape, ensuring to leave spaces for the antlers. Secure the wire with hot glue a few inches above the wooden base.
- Weave with Twine: Now it’s time to wrap the twine around the wire frame. Start from the bottom and work your way up, ensuring it’s secured tightly. This step may take a little patience.
- Finalize Your Holder: Once you’ve covered the frame, trim any excess twine. Attach your woven structure to the wooden base using hot glue to keep it stable.
Personalizing Your Design
Think about adding personal touches to your deer pen holder. You could use small beads or buttons for eyes, or paint your wooden base with lovely colors. The options are endless!
Utilizing Natural Elements
Incorporate dried flowers or leaves into your design. Attach them to the base or weave them into the twine for a rustic look.
Common Mistakes to Avoid
As with any DIY project, there are common pitfalls to be aware of while creating your pen holder:
- Skipping Sanding: Failing to sand the wooden base could result in a rough surface that detracts from your craft.
- Weak Structures: Make sure the wire is bent securely; an unstable frame can lead to a wobbly holder.
- Over-tightening Twine: Be cautious not to pull the twine too tightly, as this can warp the shape.
- Neglecting Dry Time: Allow sufficient time for paint and glue to dry, ensuring durability.
- Ignoring Personal Style: Don’t shy away from expressing your style; creativity is the heart of any DIY project.
FAQ
What type of twine is best for weaving? Natural twine made from materials like jute or hemp works particularly well for creating a strong, rustic look.
Can I use a different material for the base? Absolutely! You can use cardboard or a plastic container as alternatives, depending on the look you want.
How can I clean my handmade pen holder? Gently dust it with a soft cloth. If it gets wet, allow it to dry completely before placing any items back inside.
Conclusion
Making a handwoven deer pen holder is a fun way to enhance your workspace while tapping into your creativity. By following these steps and tips, you can create a stunning piece that reflects your personal style. What unique touches would you add to your own pen holder? Feel free to share your ideas in the comments!